How To Film Instagram Reels For Your Business


It’s official, Instagram Reels are taking over! You’ve probably seen them everywhere by now, shared one with a friend or two, or spent countless hours mindlessly scrolling through video after video in near tears from laughter.
With the advent of reels, it is now easier than ever to create entertaining and educational video content for your audience. But we totally get it, if it's not what you’re used to getting in front of a camera might feel super cringey and intimidating but trust us, you can handle this. Plus, since Instagram created Reels to compete with TikTok, they are really pushing their use. That means Instagram Reels are the best way to beat the Instagram algorithm and expose your content to a wider audience and that’s something you definitely want to take advantage of!
So how do you create an Instagram Reel? We’ll break it down into simple steps to help you get you going. Before we get into the nitty gritty step-by-step, here’s a few tips for before you press record:
How To Film Instagram Reels For Your Business
1. Do An Inspiration / Research Session To Get Inspired
Set a timer for 15 minutes (really, set that timer or you’ll go down a rabbit hole) and take a look at what’s out there to get ideas for what types of reels you can make for your business. Remember this is all about inspiration not imitation. Binge watch a few reels to see how others have used a combination of music, dancing, comedy and education to create engaging short clips.
2. Make Notes And Outline Your Plans
Even though these videos for social media can be more casual, you still want to have a good grasp on what you will be saying once you hit that record button. Making notes allows your mind to really absorb the messages or key points you want to get across. The act of writing things down or typing them out will also help the information be more organized and thoughtful. Keep in mind that you don’t actually want to read your notes while filming though because that rarely comes across as genuine, but having a good outline of what you want to do or say will help you feel more confident and prepared!
3. Stick To Topics And Video Styles Appropriate For Your Niche
Just because other people are dancing or pointing on the app does NOT mean you have to! There are so many other engaging ways to film videos on Reels. If you don’t want to wiggle on camera, here’s a quick list of other ideas for Instagram Reels.
Before and after transformations
Talk straight to the camera
Lip sync / mouth the words over a popular audio and make it relevant to your business / industry / niche
Create a quick tutorial
Film a list like “Here are the 5 things I need to do ______”
Share behind-the-scenes
Create a “meet the team” video
4. Practice, Practice, Practice
It doesn’t matter if you’ve been doing this for 2 days or 20 years, the truth is we all get nervous when that red dot starts flashing. The key is to keep practicing! You’ve heard it before, practice makes perfect! Or if not perfect per se, at least more familiar which equals more comfortable, so find a quiet location with great lighting (don’t underestimate the glow from a well positioned window) and just start! You got this!
Step-By-Step Screenshots For How To Create An Instagram Reel
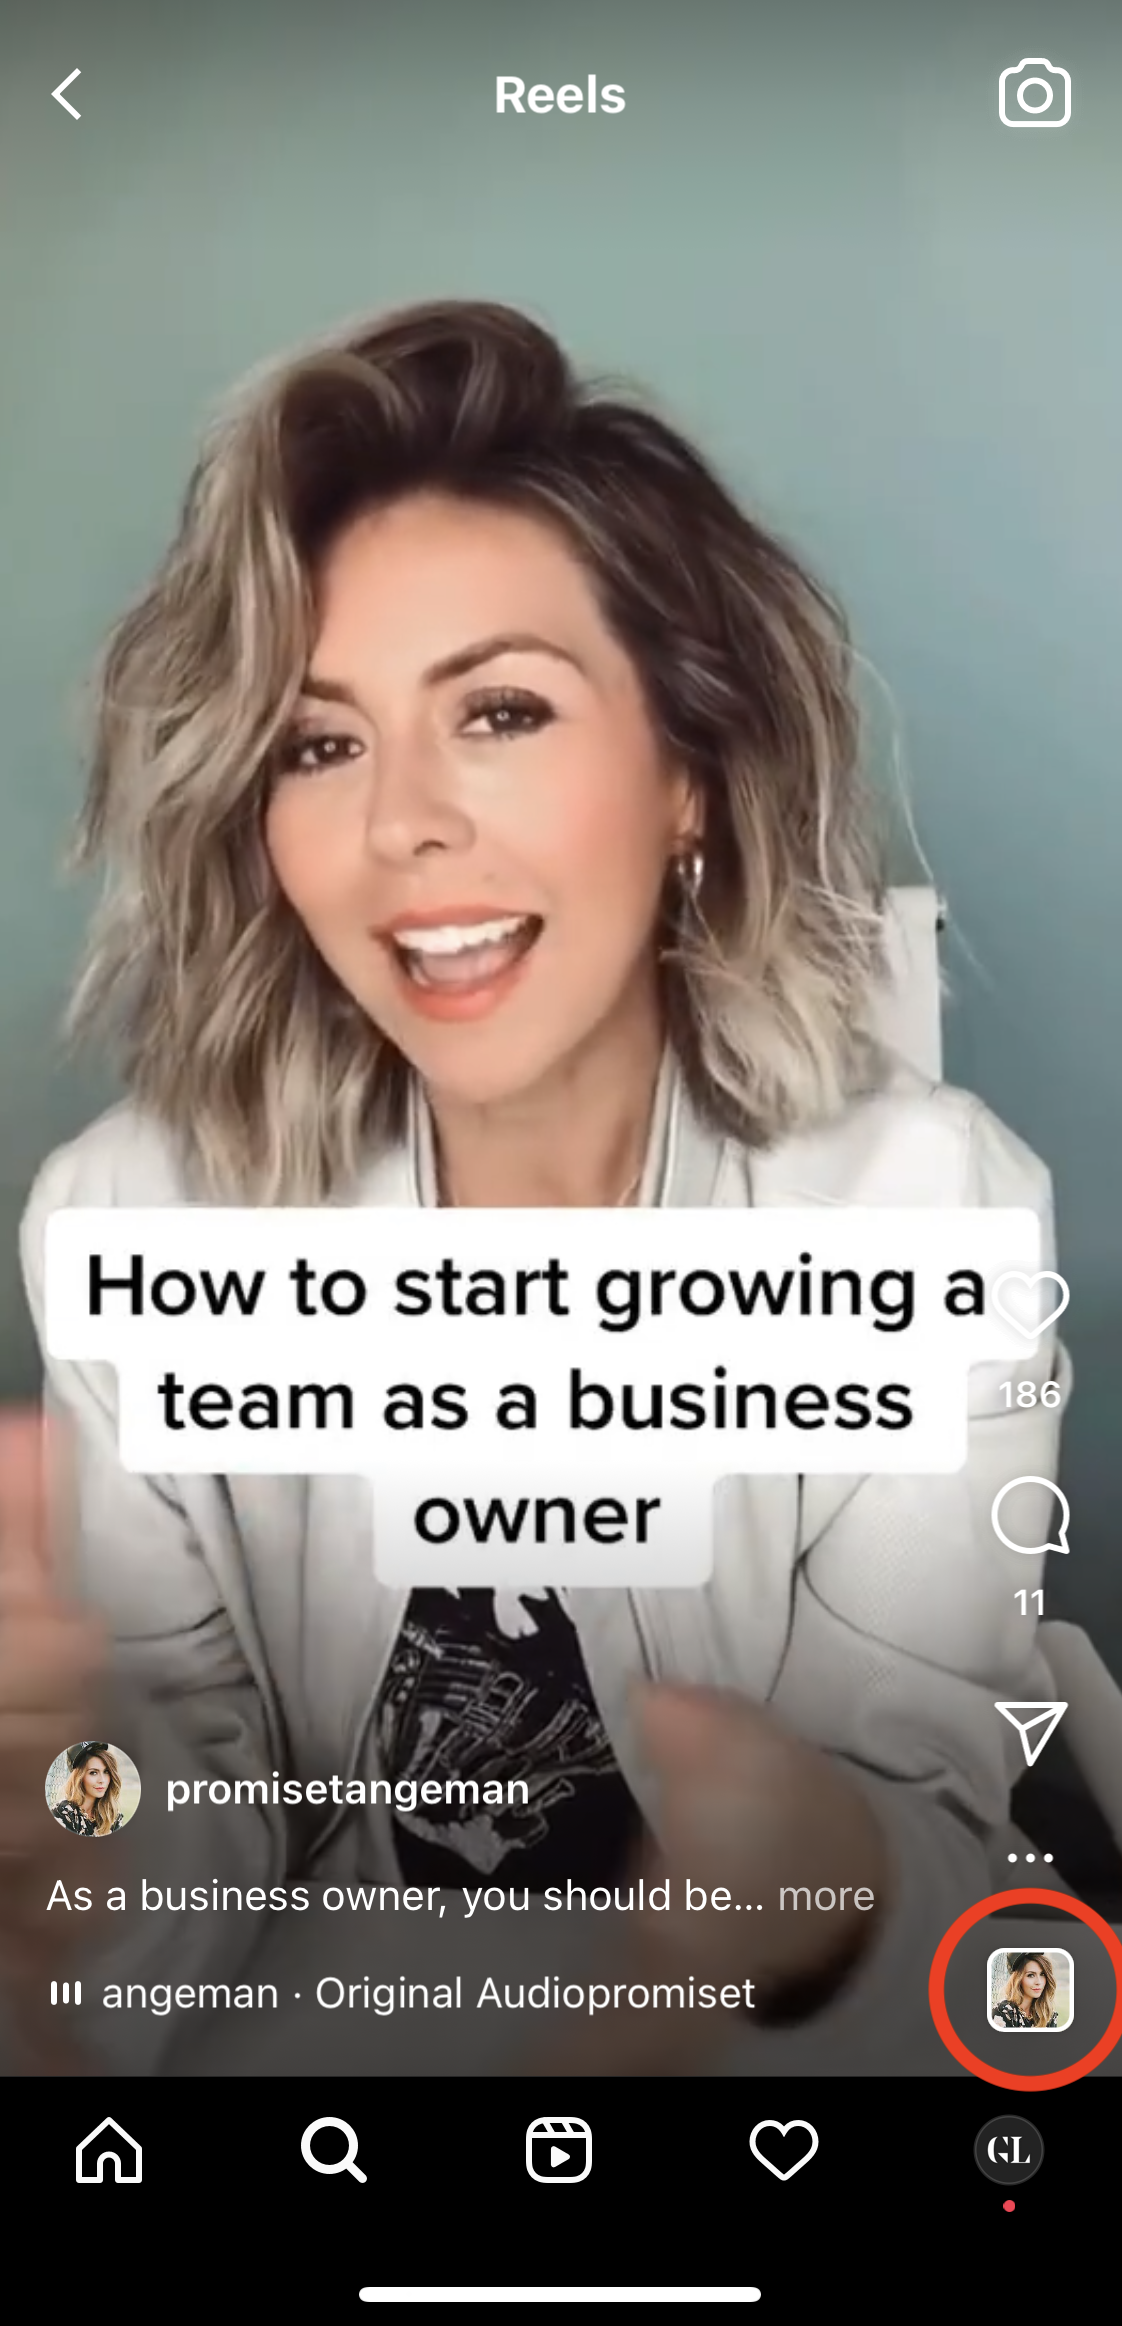
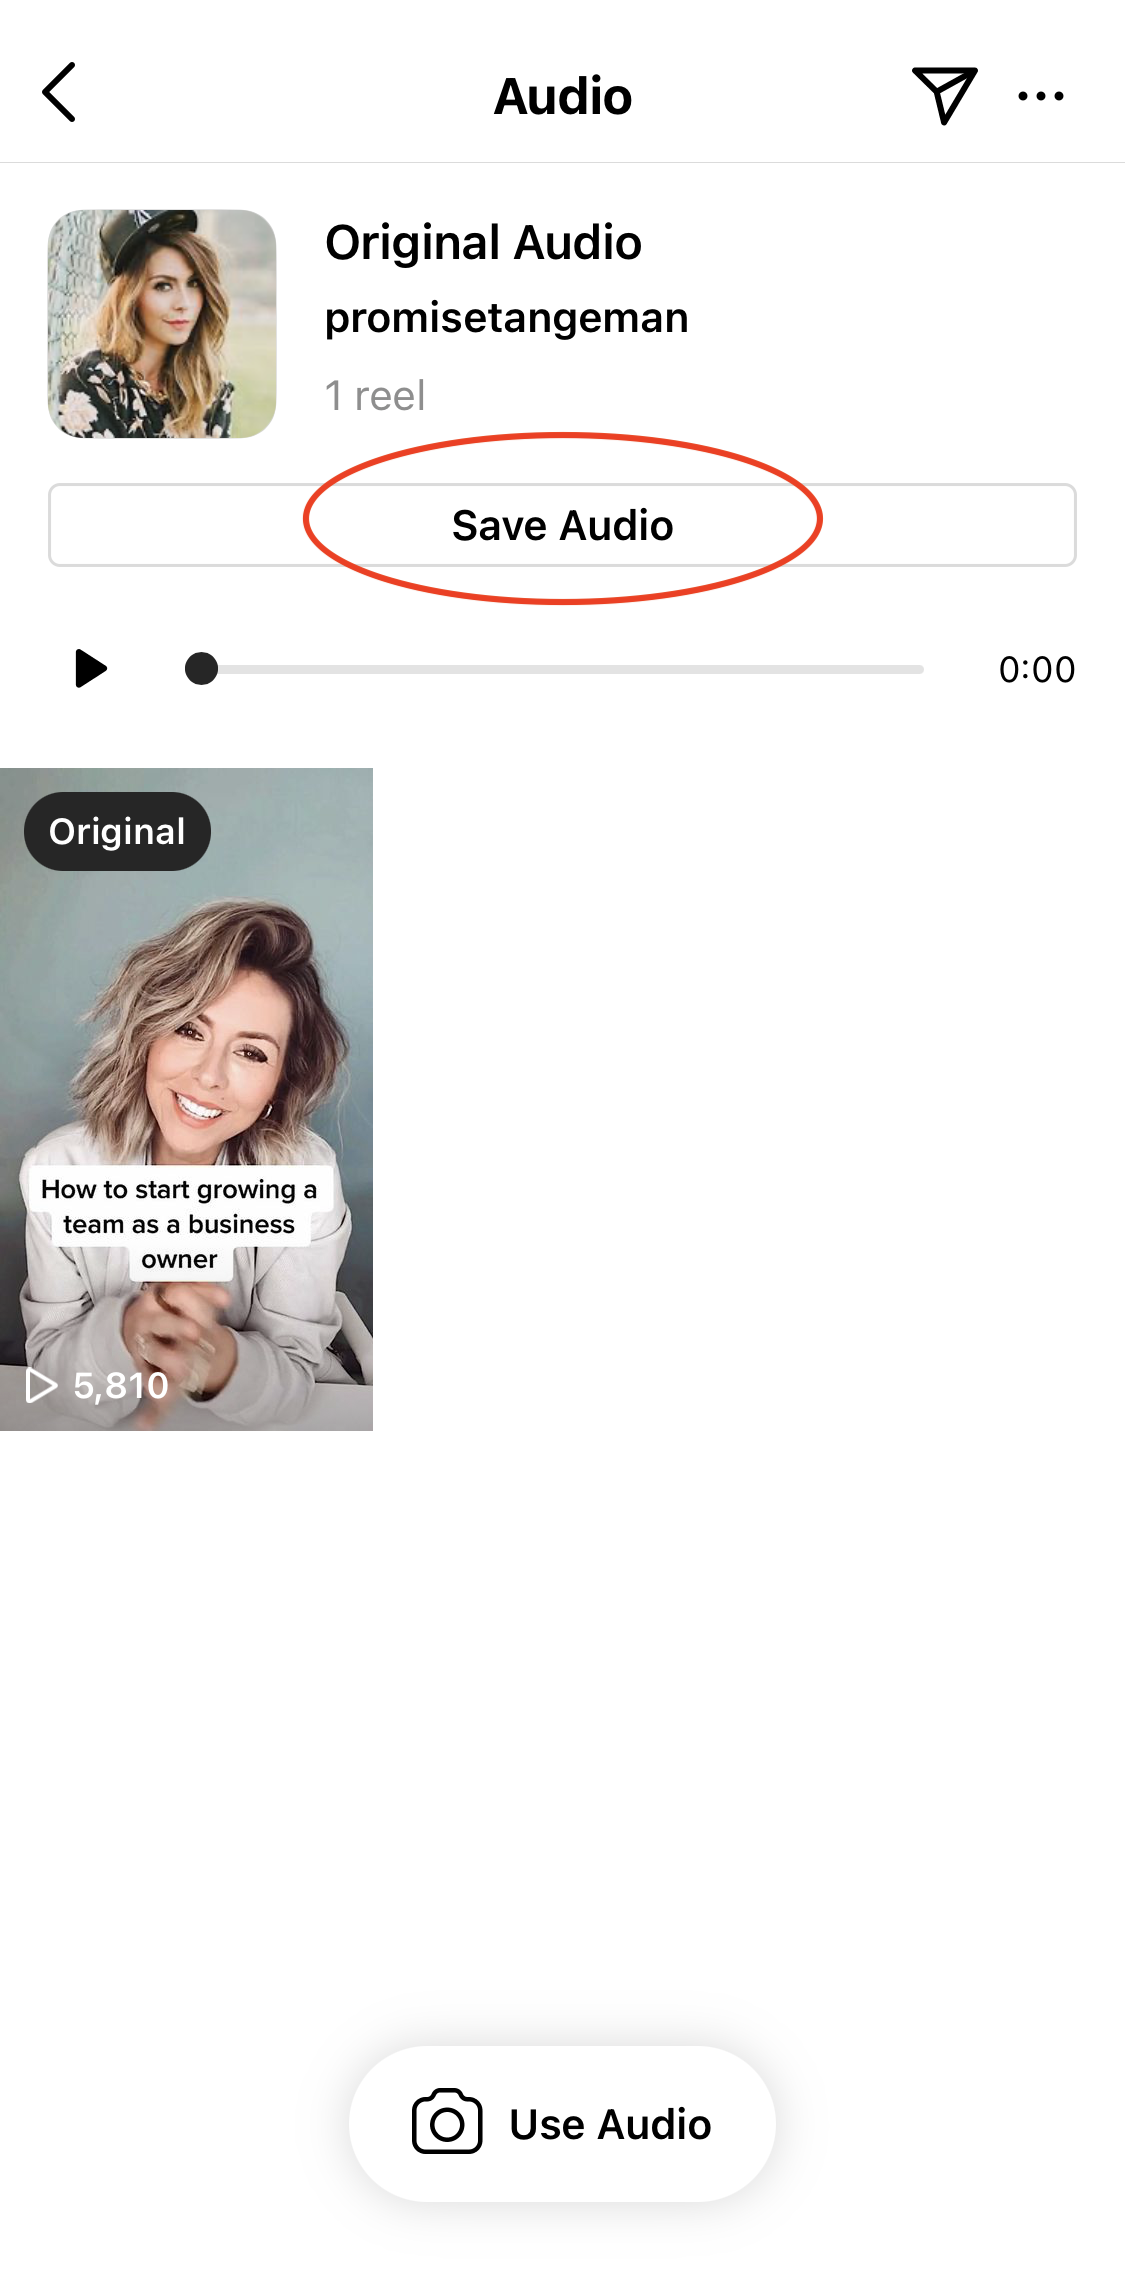
1. To begin creating a Reel find and save the audio you want to use by scrolling through Instagram.
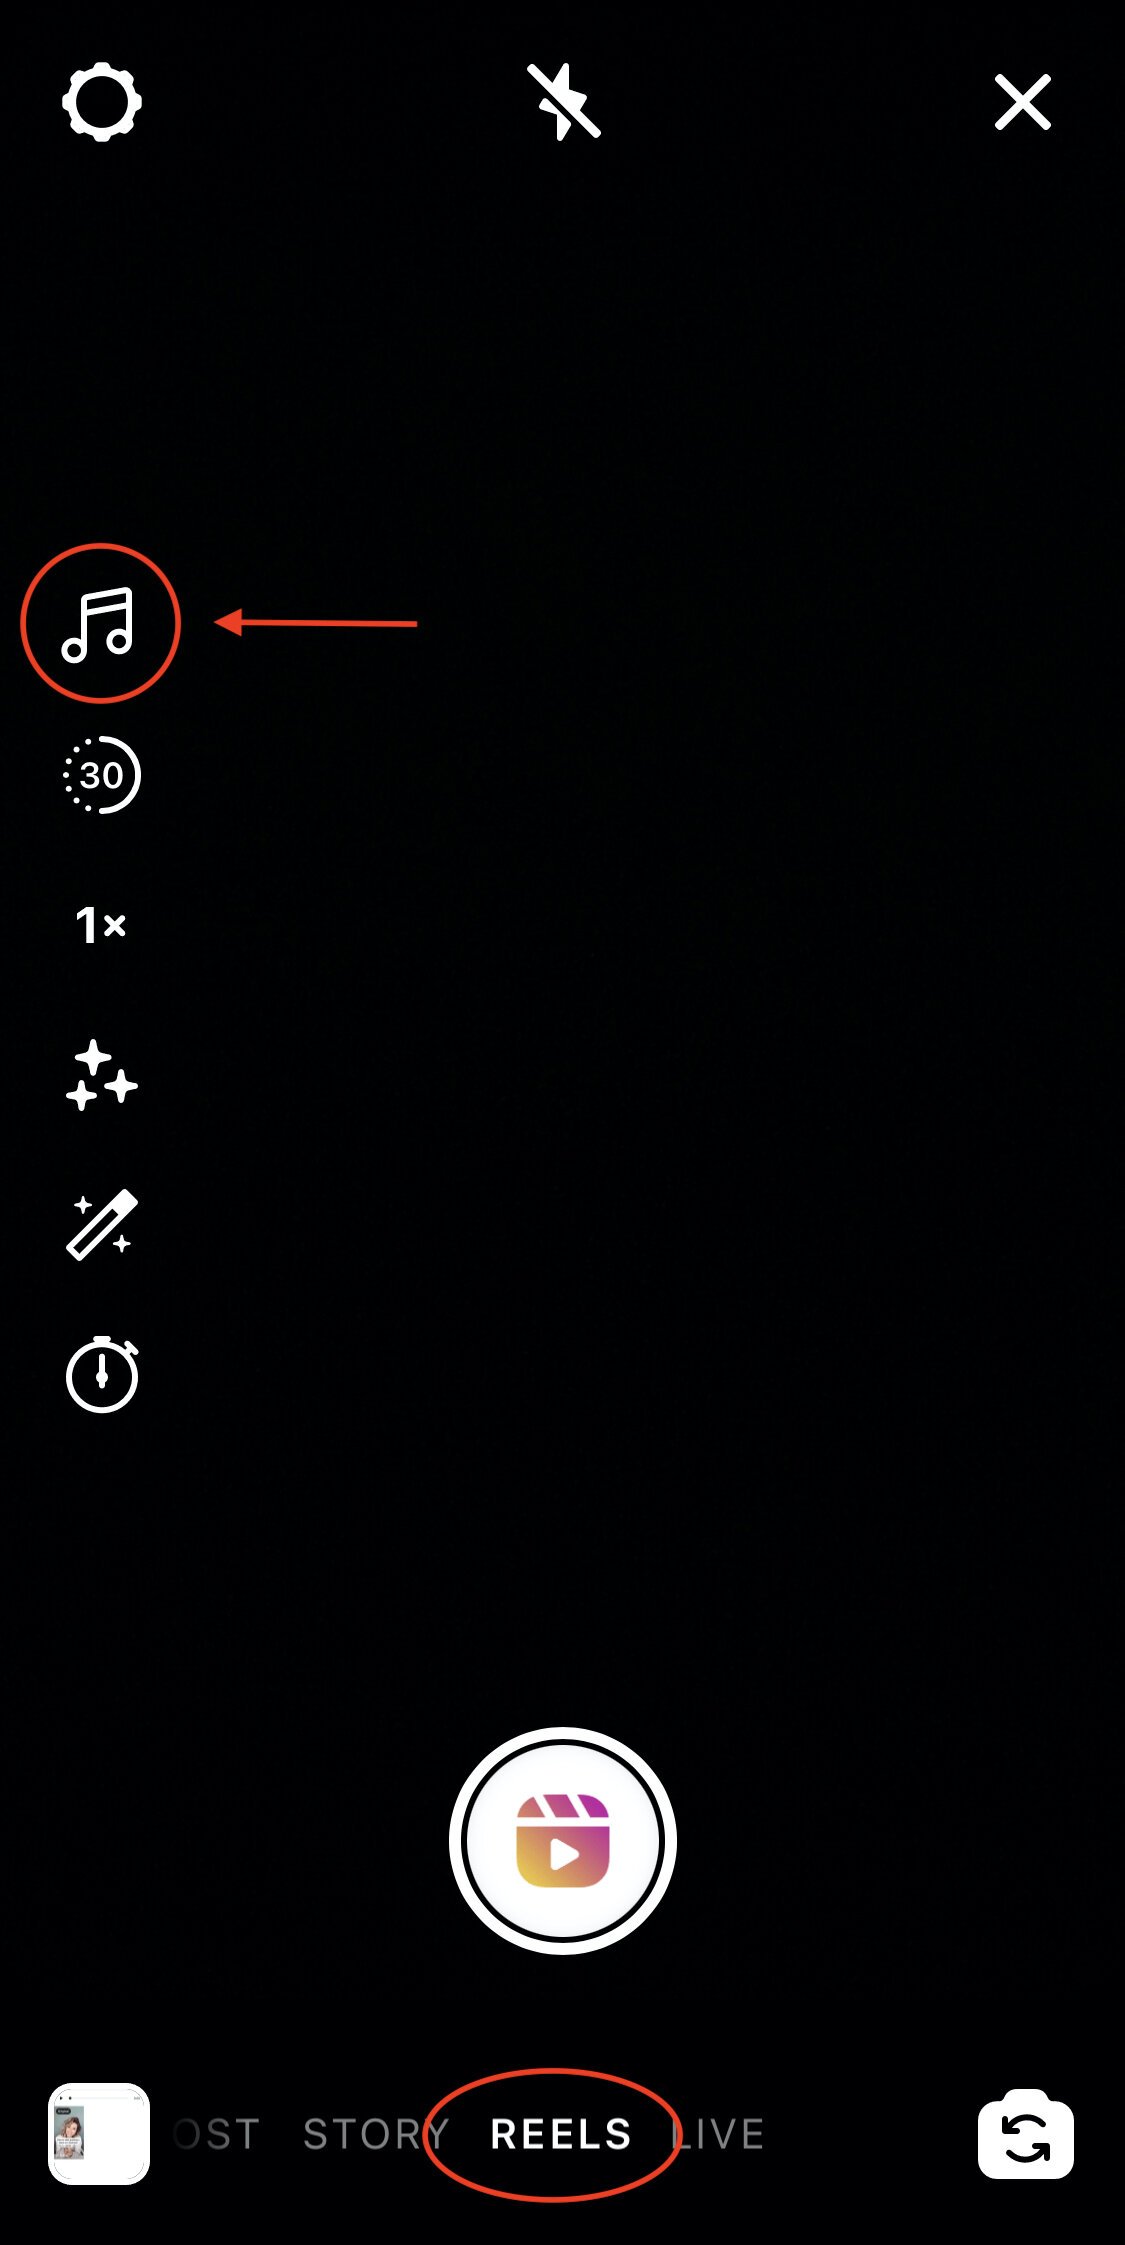
2. Next, open up Reels by going to your stories and scrolling to the Reels setting. Then, select the music icon on the left-hand side.
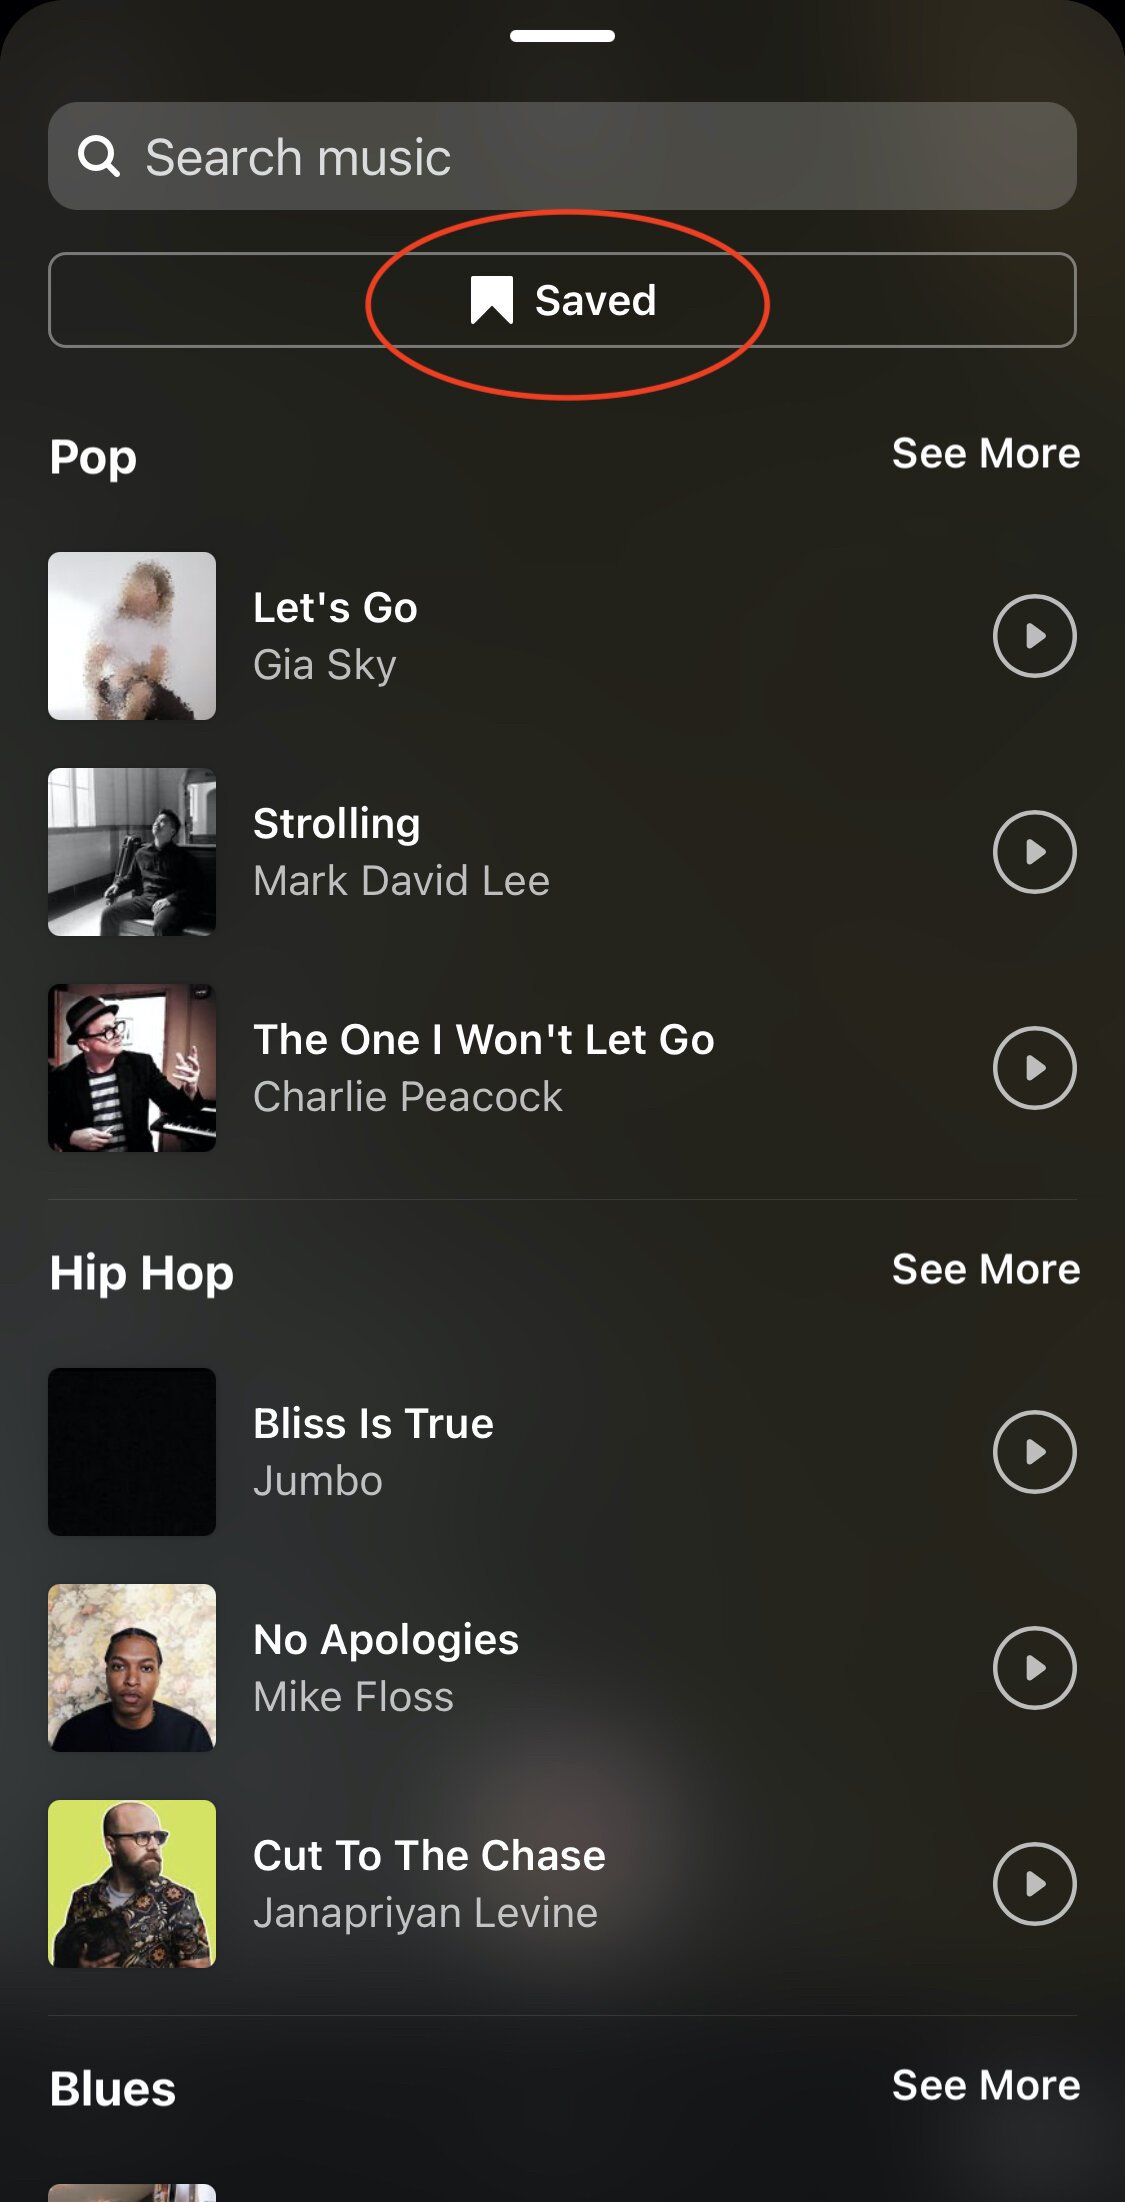
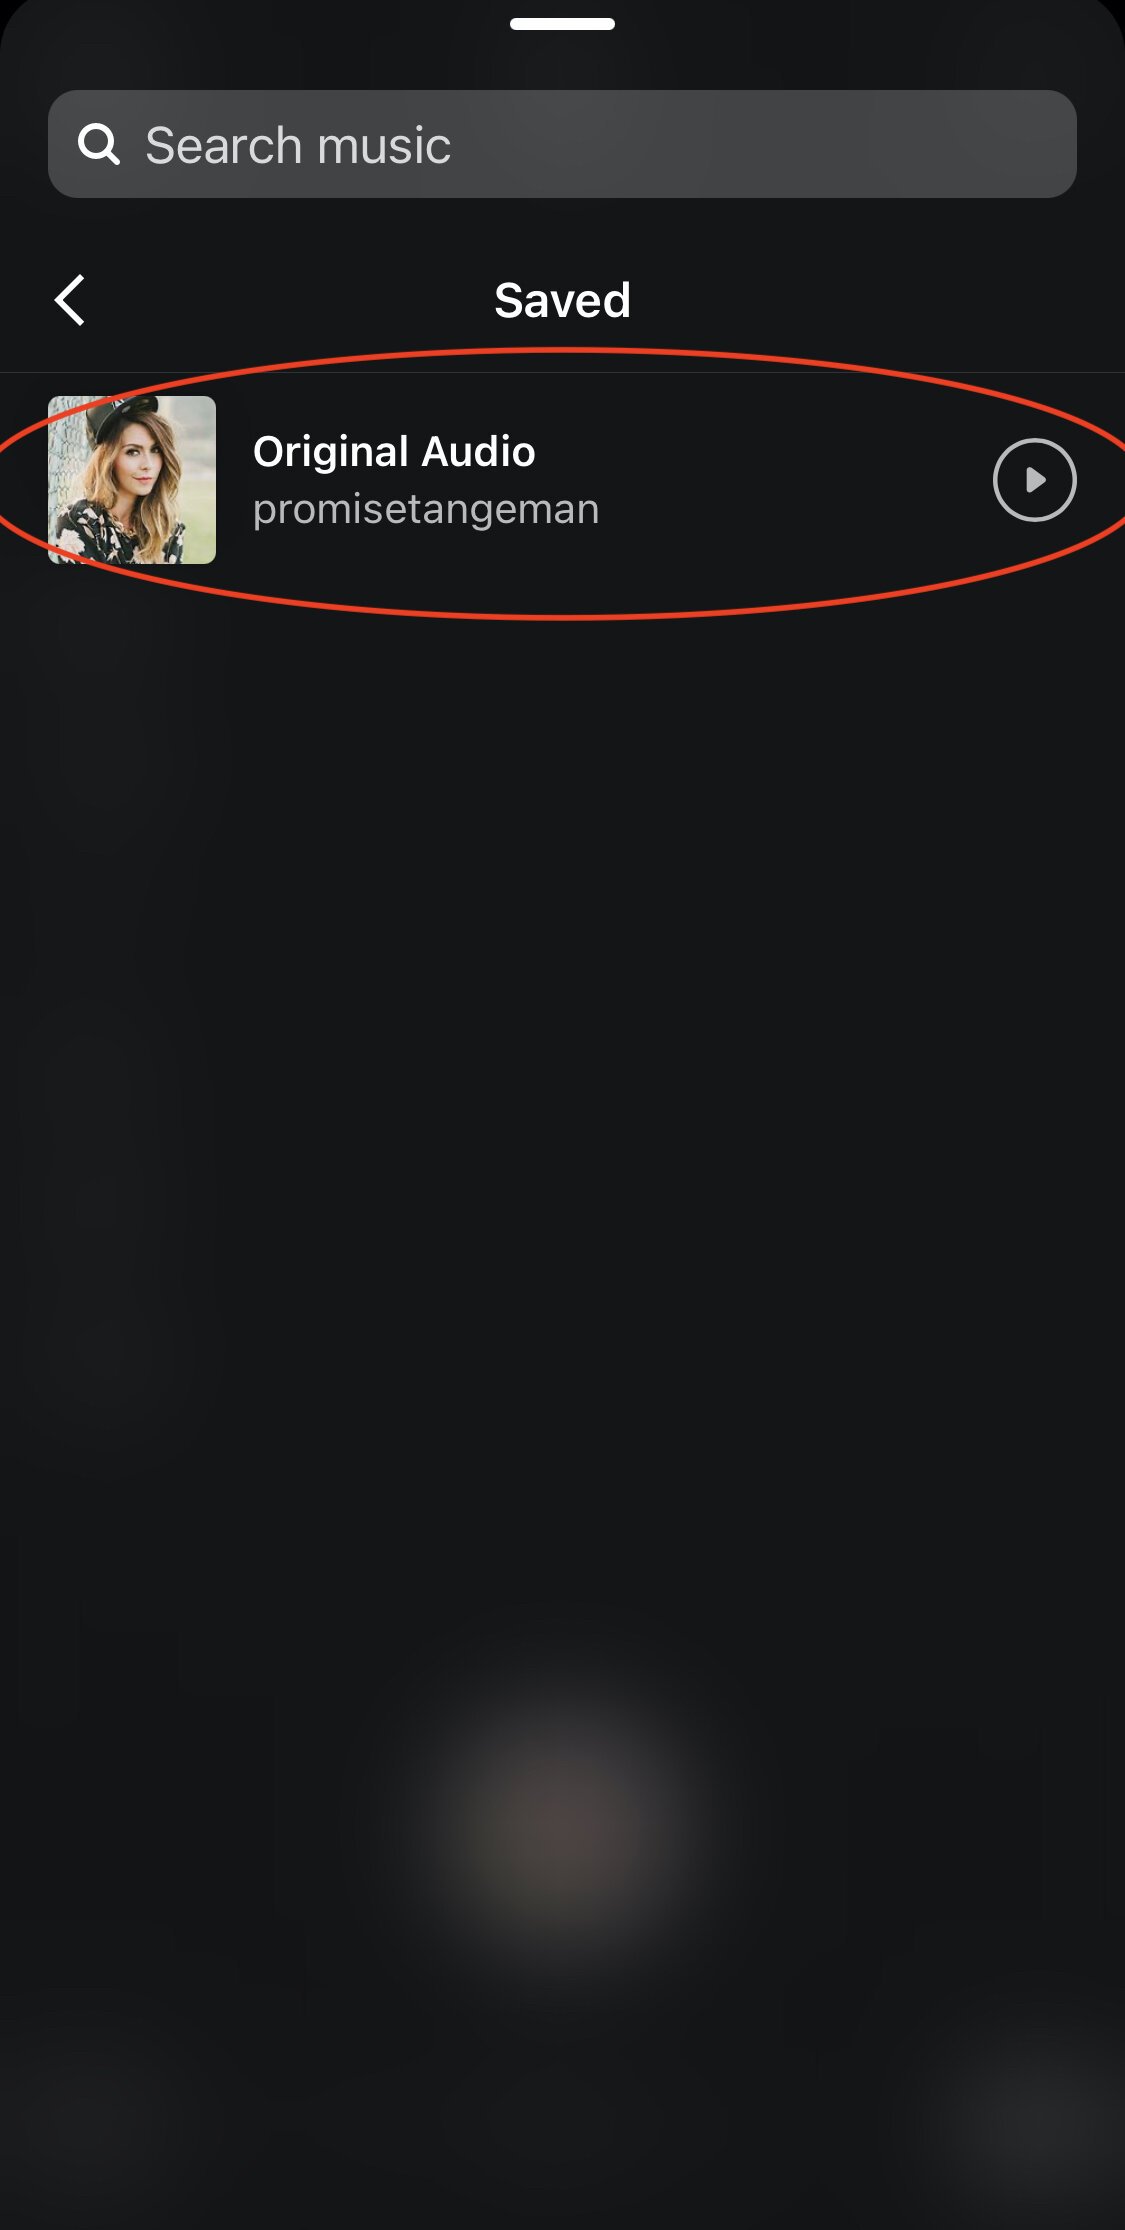
3. Click “Saved” and choose the audio you just saved and want to use.
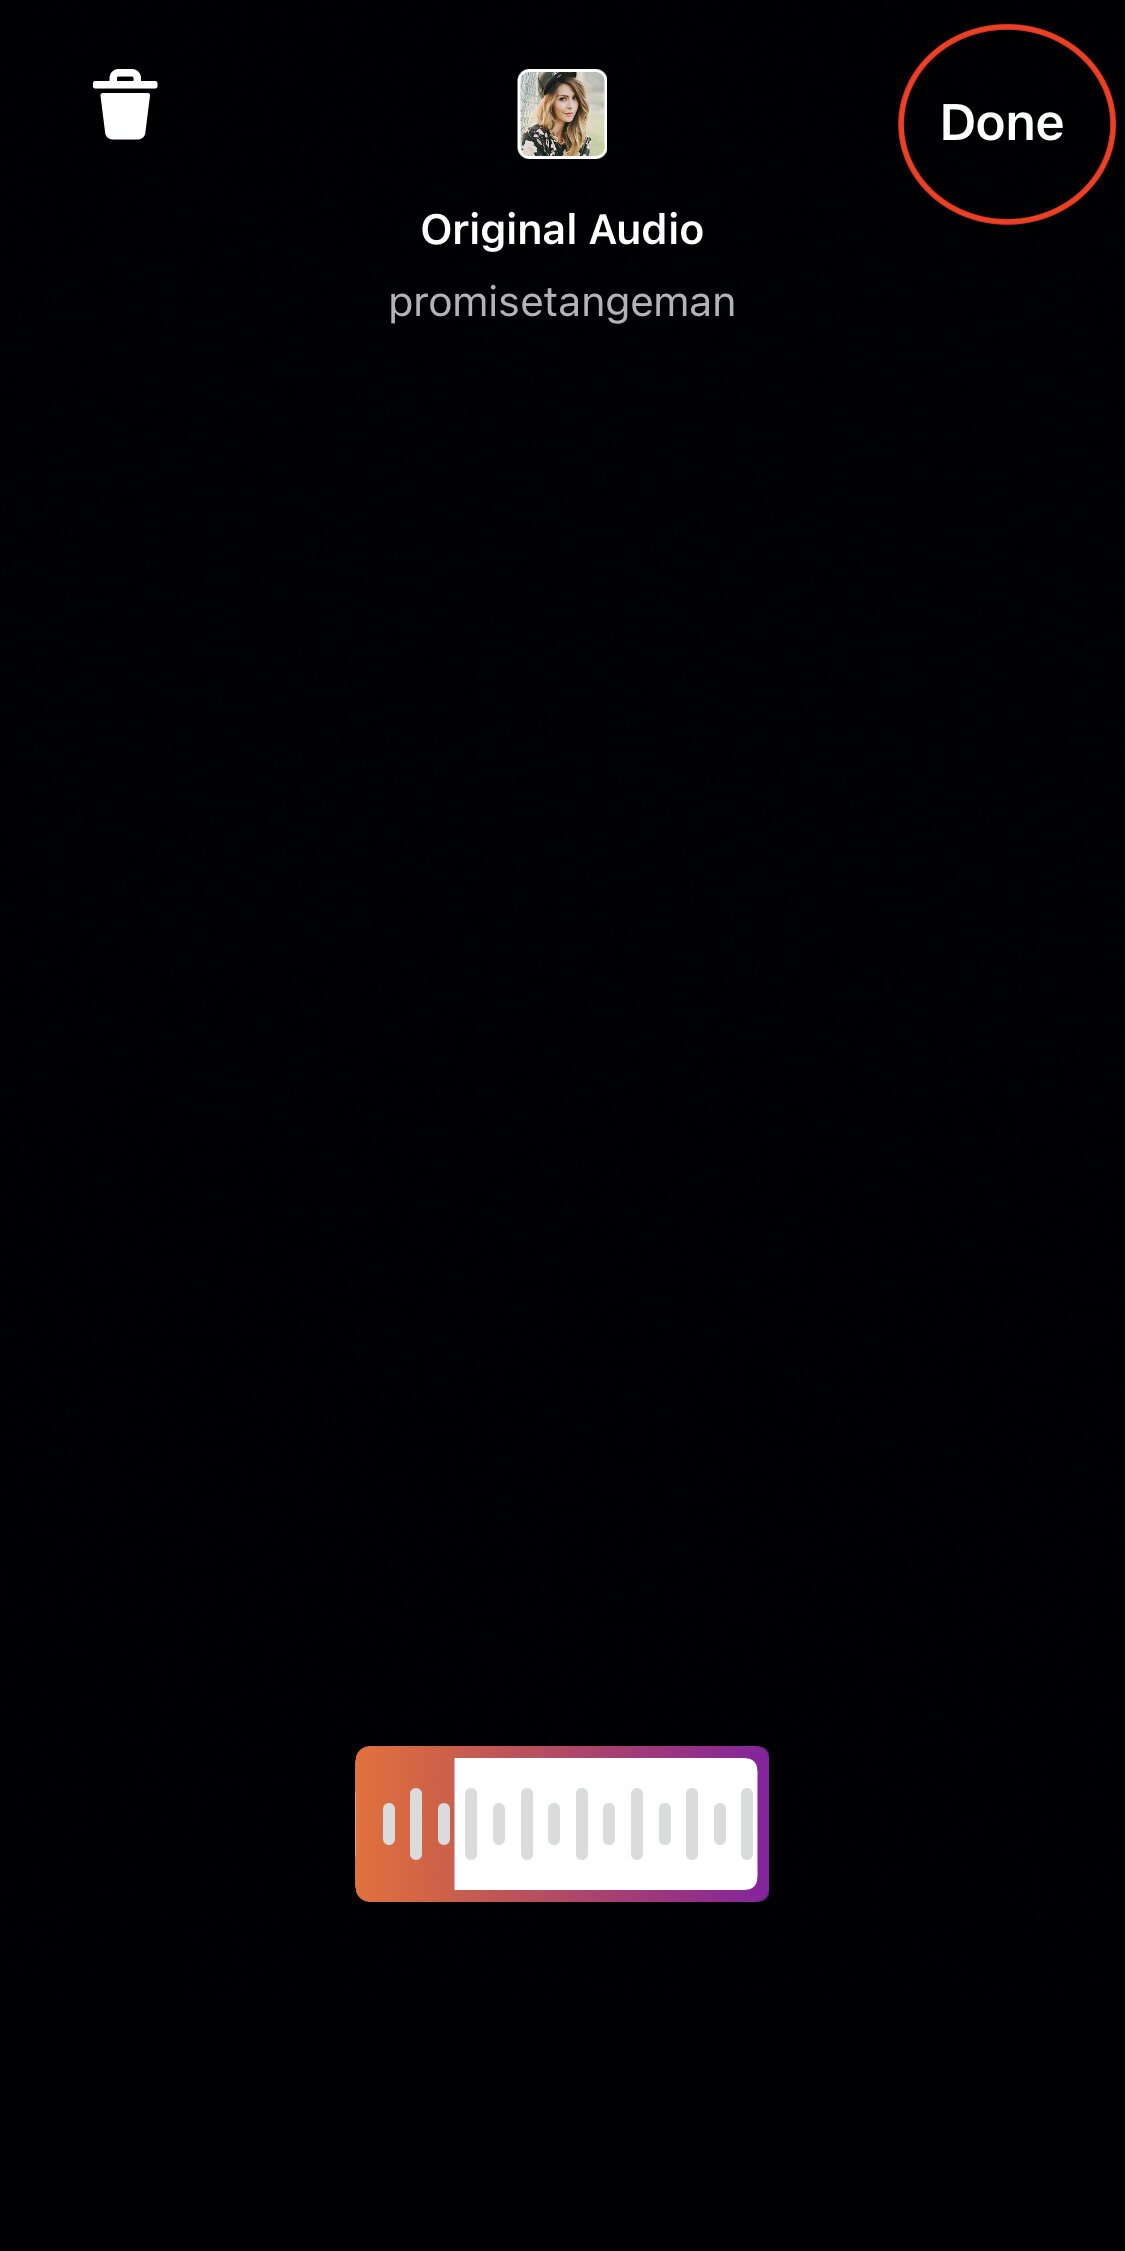
4. A preview of the audio will play, and if you’re happy with it, hit done!
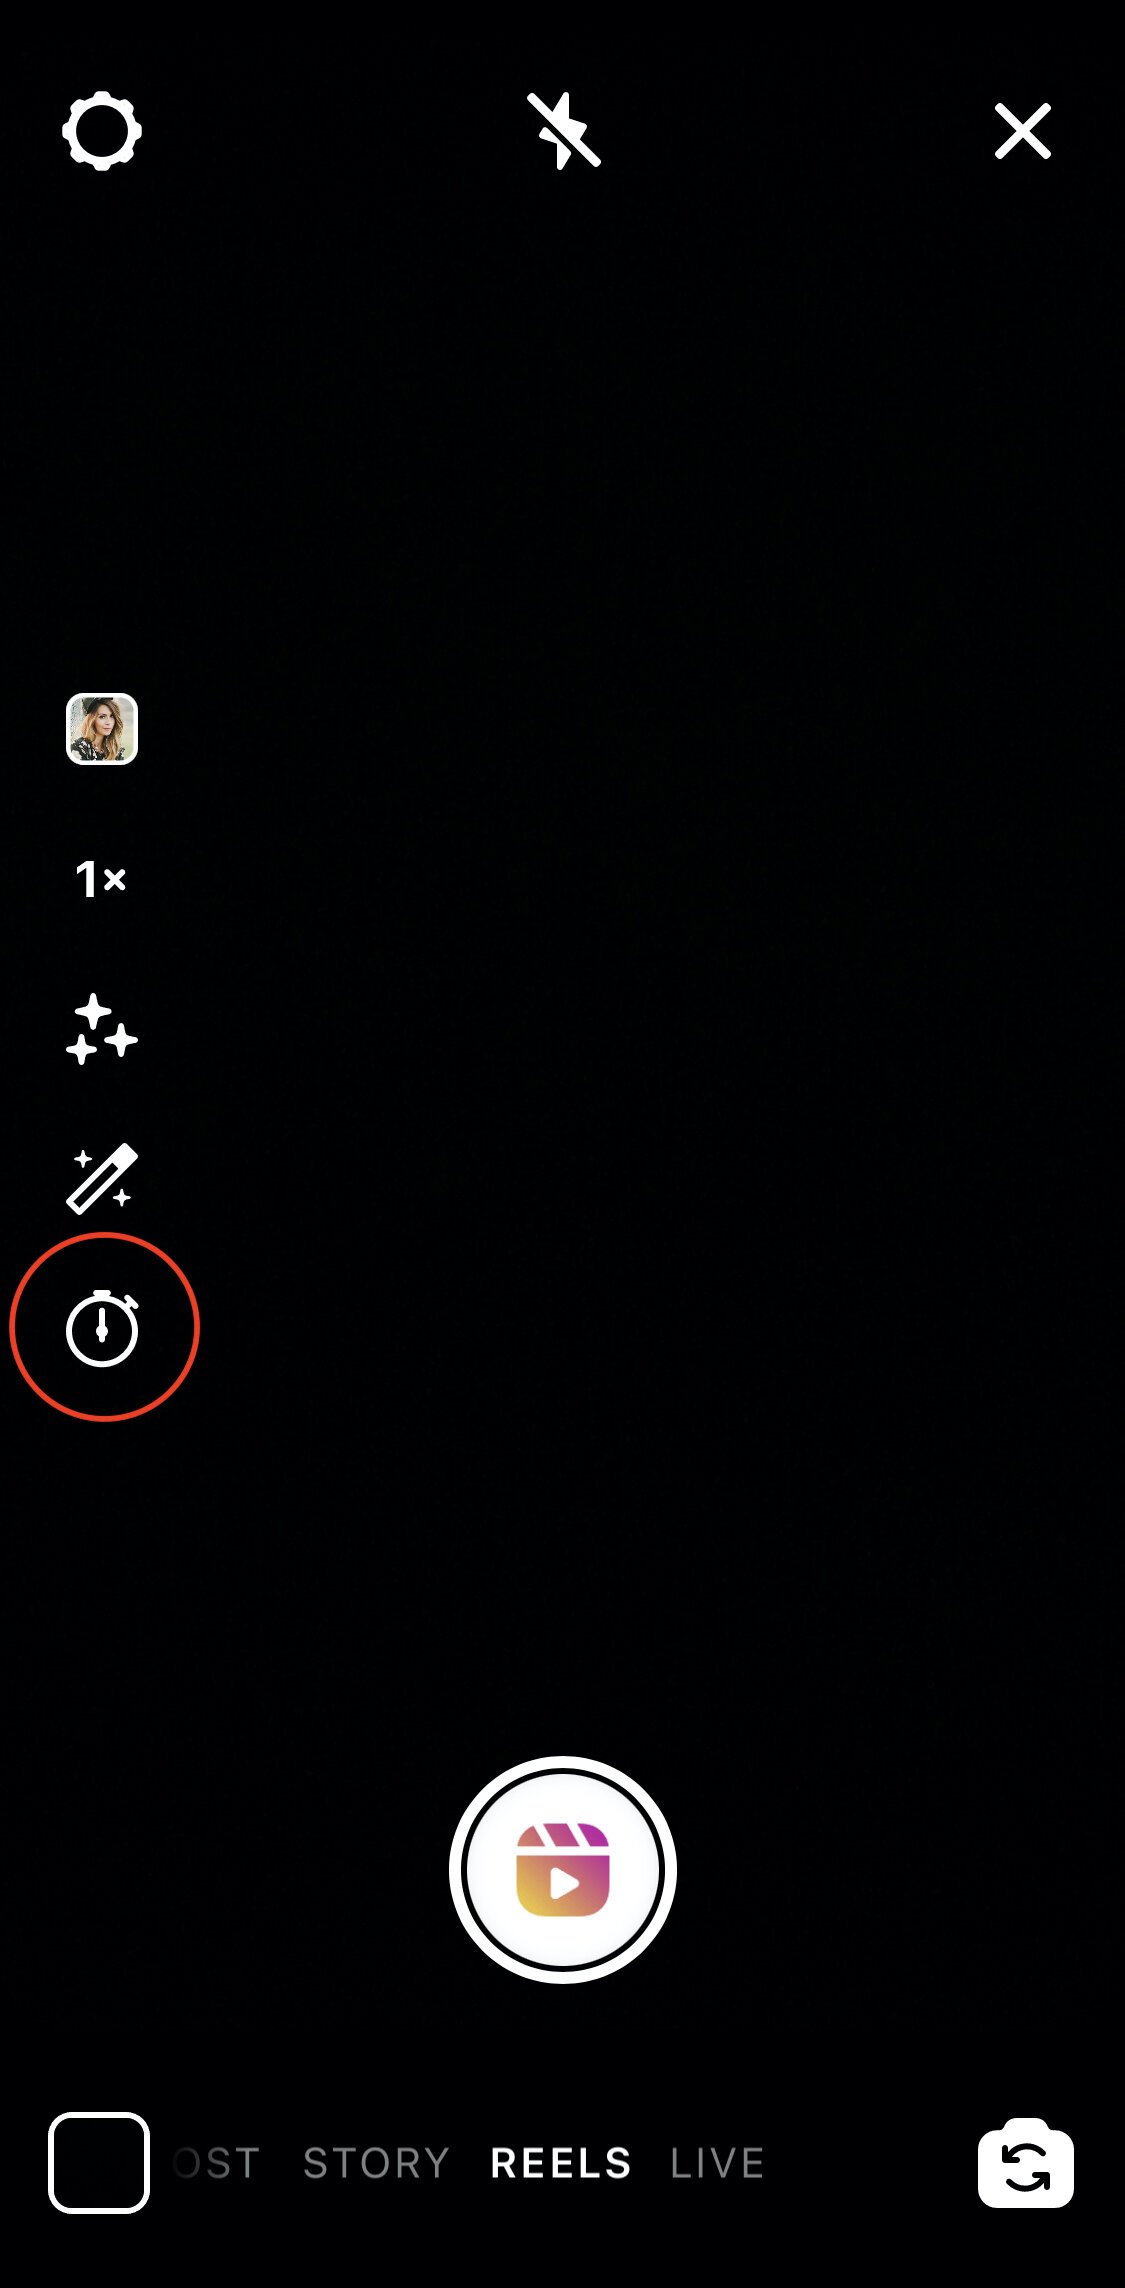
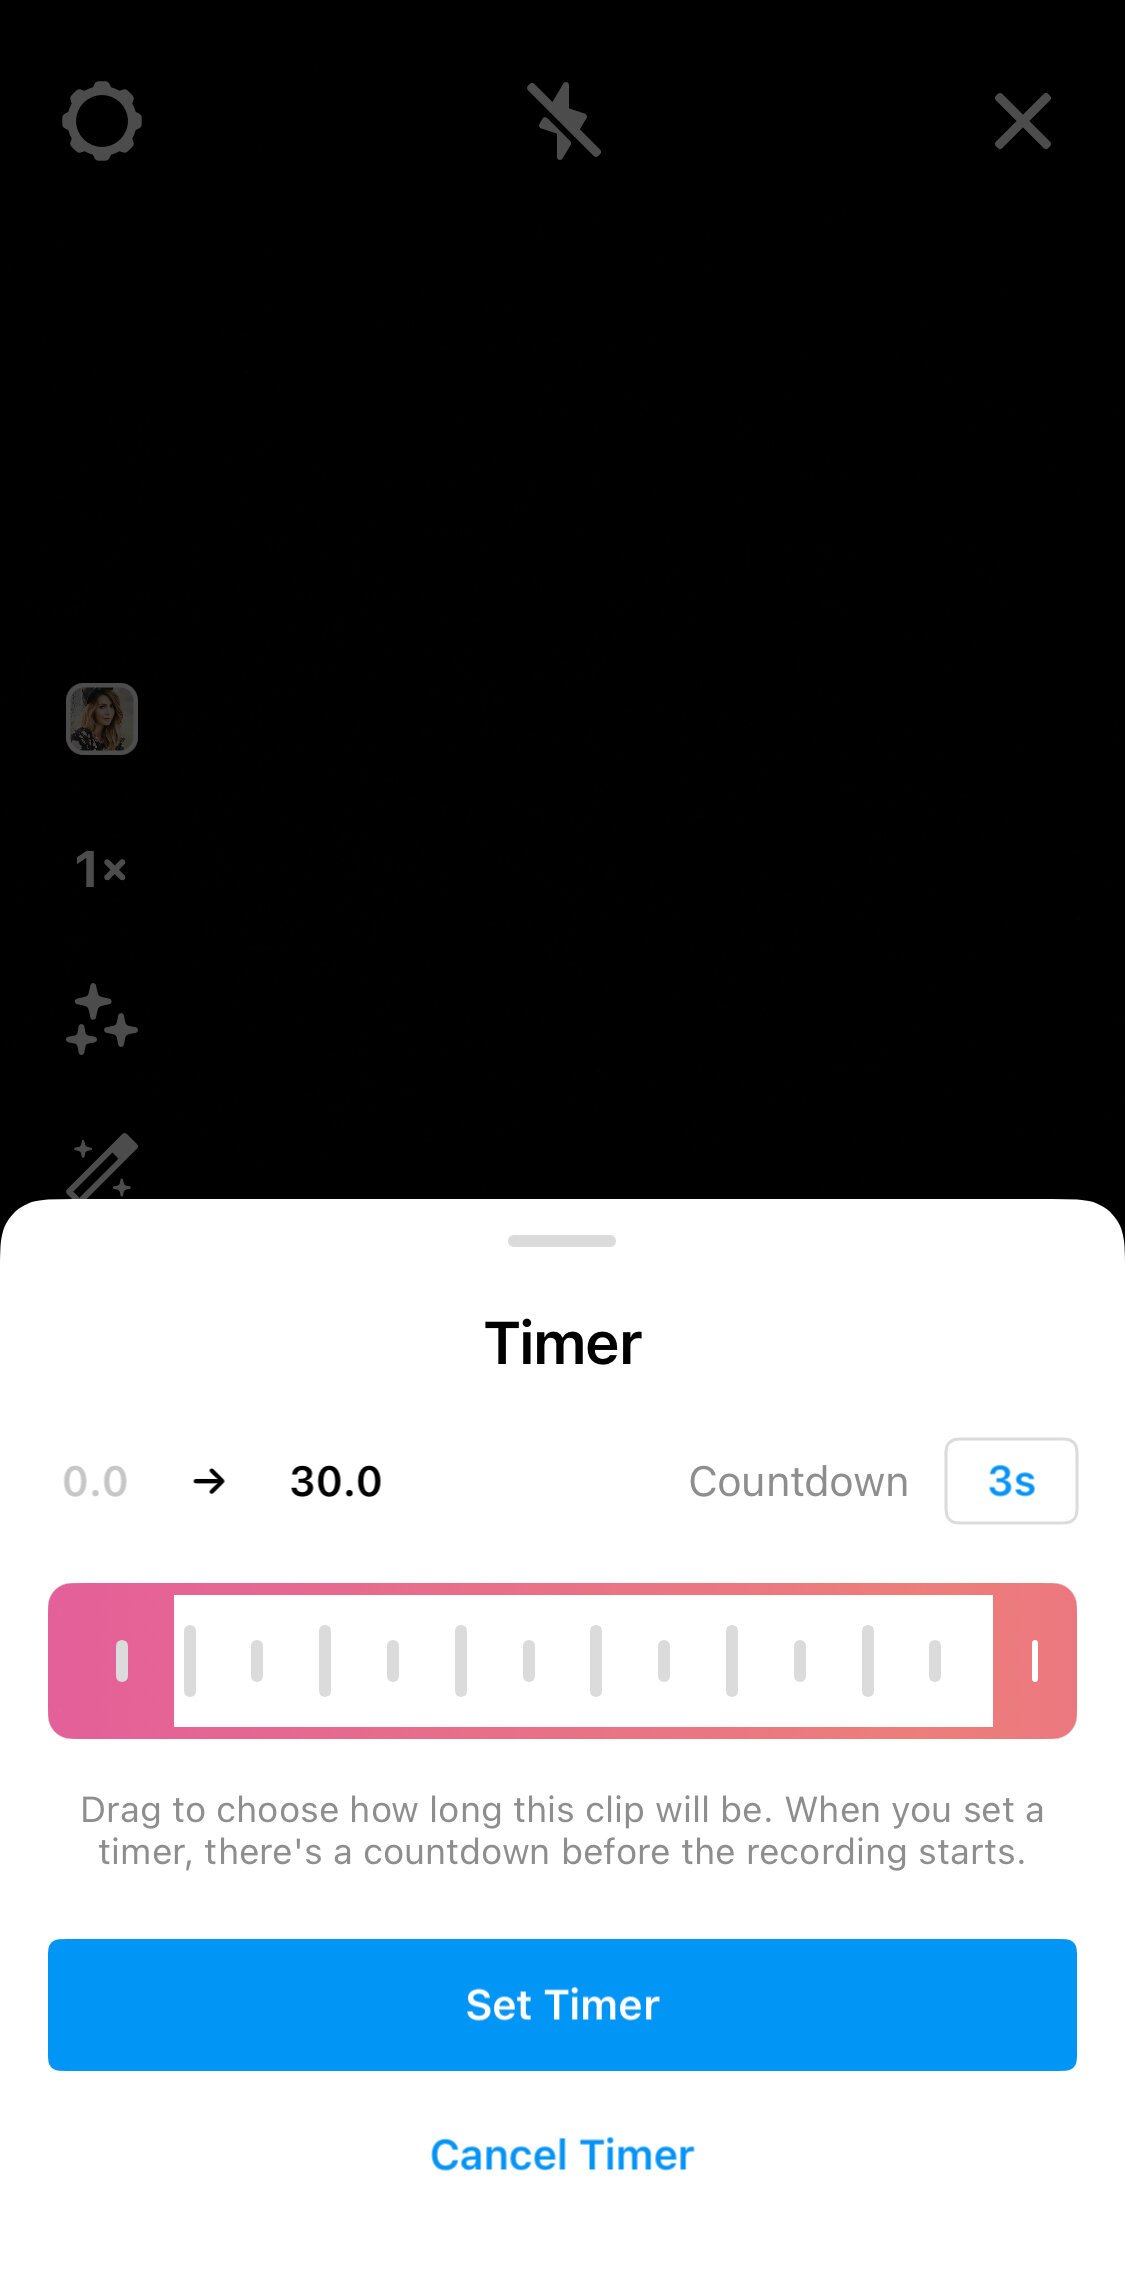
5. You can use the countdown feature to get ready for your close up or record a specific selection of the song. To do this, simply drag the bar across the timeline.
6. Now you’re ready to begin recording! Hit the play button at the bottom and you’re on your way!
7. To add words click the Aa button on the top and type away.
8. To change when your text appears, click on that phrase and drag the bar across the video timeline.
9. When you’re happy with your video type up your description and hit post.
The Wrap Up
And voila! Your first Reel! See, that wasn’t so bad was it? Reels can be a fun and exciting way to communicate with your audience in a way that feels fresh, personable and authentic and the best part is you can start right now! No need to try and be a Spielberg here, just have fun with it!
P.S. If you’re creating dynamic content on your Instagram, there’s no reason you shouldn’t share that on your website! Click below to watch our quick and easy tutorial on how to add your Reels to your Squarespace website.

Related Articles


Popular Posts