
How To Create A Testimonials Slider On Squarespace
Including client testimonials on your website is a super effective strategy to convince someone to book your service, purchase your product, sign up for your class, or whatever it is you do! When people can hear real life stories of how your business totally changed their life (or how they absolutely LOVED the product they received from you, etc) , they’ll want to get it on the magic for themselves.
It’s a great idea to include your client testimonials on the homepage of your website, or you can also dedicate a page in your navigation to them. Be sure to choose the BEST testimonials you’ve received from clients – not just the simple “I loved it!”
You want to feature testimonials that truly capture why they loved working with you, purchasing from you, etc. If you’re using Squarespace for your website, read on for our tutorial on how to create a testimonial slider like the one pictured below!
PRO TIP: Make sure to limit your testimonials to 1 to 2 short sentences. The biggest thing to remember in web strategy is that NO ONE is going to read big chunks of text on your website.

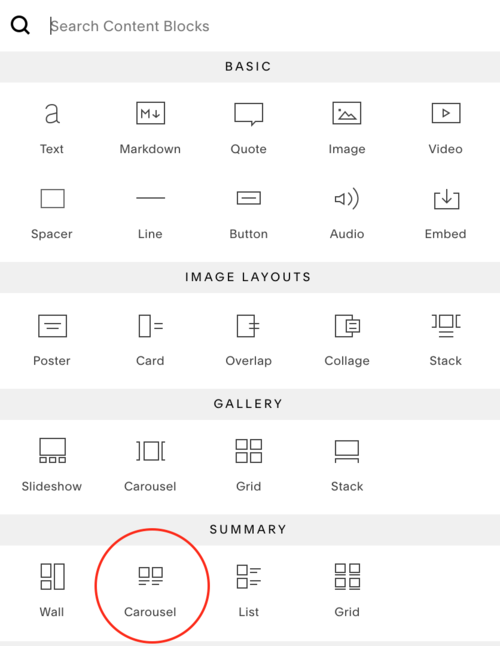
In Squarespace, you can create a testimonial slider by using a Carousel Summary Block that populates testimonials from blog entries.
How To Create a Testimonials Slider on Squarespace
STEP ONE: Under the Pages Tab, create a new Blog Page. This new blog will host all of your client testimonials, NOT your blog content. To do this, just click the plus sign on your pages menu to add a new page, select “blog” from the options, rename it “Testimonials,” and then drag the blog to the “not linked” section at the bottom.

STEP TWO: Within your new Testimonials Blog page, create a new blog post.
STEP THREE: Add your testimonial content to your new post. Under “Options” on your new blog post screen, add your testimonials to the “Blog Excerpt” section. Style the font how you’d like (heading 1 , 2 or 3) and be sure to include to include names.

STEP FOUR: Save, publish and repeat. Repeat this for as many testimonials as you’d like to include.
STEP FIVE: Create the slider. Head to the page or section of your website you want to feature your testimonials slider. Add in the slider by creating a Summary Content Block.
STEP 6: Adjust your slider settings with the following specifications:
Under The Content Tab: Choose Blog > Testimonials

Under The Layout Tab: (Feel Free To Customize These To Fit Your Needs!)
Header Text: None
Aspect Ratio: 1
Items Per Row: 1
Text Size: Large
Text Alignment: Center
Metadata Position: Below Content

Under The Display Tab:
Number of Items: Optional
Show Title: Unchecked
Show Thumbnail: Unchecked
Show Excerpt: Checked
Show Read More Link: Unchecked
Metadata: None

Now you have your testimonial slider set up. Let us know in the comments if you use this tip for your website!
And if you’re looking for an updated & refreshed website look, check out our premium Squarespace website templates for sale!
Pin This Tip For Later!

FIND MORE RESOURCES
Check Out Our Tech Tips
Related articles