
How To Create A Squarespace Account And Domain
In this post, we’re taking it back to basics and showing you step-by-step how to create your Squarespace account!
Step One: Visit squarespace.com and click “Create a Site” on the top right corner.

Step Two: Choose a Template
If you purchased one of our Templates, you can find which template to choose on your private Tutorial page (which you can access via the Start Here document included in your download!)

Step Three: Add your account info.

Step Four: Follow the Squarespace set up instructions and add your Site Title and Description.


Congrats! You’ve officially created your Squarespace account! What’s awesome about Squarespace is that they give you a Free 14 day trial you you have some time to play around! However, once the 14 days is over, you’ll need to upgrade your account to a Personal or Business plan.
Upgrade Your Account & Select a Plan
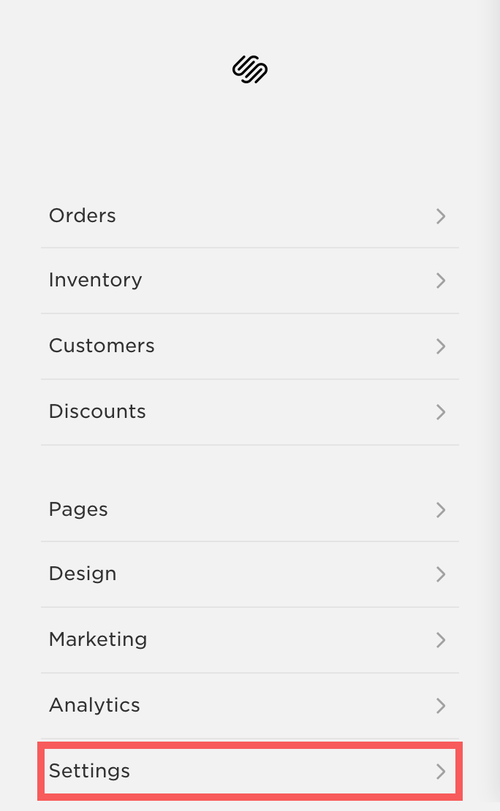
Step One: Click “Settings” On your Squarespace Dashboard.
Step Two: Click “Billing & Account".

Step Three: Click “Billing”, then select “Upgrade Your Plan”.


Here, you’ll have a selection of regular Website Plans and Commerce Plans.


If you plan on having an Online Shop on your site, you'll need to go with one of the Commerce Plans. If you don't plan on having an Online Shop on your site, you can go with one of the Website Plans. Also, if you're not sure whether you'll need Commerce functionality down the line, you can always change your plan at any time!
HERE'S A BREAKDOWN OF THE DIFFERENT WEBSITE PLANS:
"Personal Website Plan
"The Personal plan is well-suited to smaller sites with one or two contributors. If you're an individual or small group looking to display work, write a blog, provide information, or establish a basic web presence, the Personal plan should meet your needs.
Key features include:
A mobile-optimized website with up to 1000 pages
24/7 customer support
Business Website Plan
For more robust sites, the Business plan allows unlimited contributors and supports Premium features like Squarespace Commerce, custom code, and built-in integrations with third-party services. If you need extensive content or a team of editors or admins, the Business plan is an affordable way to create and manage a site.
This plan is ideal for displaying your work, creating a home for your business, and selling products on a small shop page (for example, if you’re an artist selling prints or a band selling merchandise). The Business plan uses the same store design and checkout flow of the Commerce plans, still letting you sell unlimited items but with simplified features.
Includes all features in the Personal plan, plus:
Fully integrated Commerce (3% transaction fee)
$100 Google AdWords credit
Custom code, including the Code Block, Code Injection, and the Developer Platform
All other Premium features (see the full list)
HERE'S A BREAKDOWN OF THE DIFFERENT COMMERCE PLANS:
Commerce plans come in two tiers, Basic and Advanced. Both are suitable for smaller retailers new to eCommerce and larger stores with advanced marketing and shipping needs. If selling online is the primary goal of your site, this is the right option for you.
Basic Commerce Plan
The Basic plan supports smaller businesses and eCommerce retailers who don't need advanced integrations for shipping or marketing. If your site is focused on eCommerce, you can sell unlimited items and build your online store on our commerce-focused templates.
Includes all features in the Business plan, plus:
No Squarespace transaction fees
Advanced Commerce Plan
For larger eCommerce stores that process many orders and need advanced shipping and marketing options, the Advanced plan offers a full set of state-of-the-art selling tools. Integrate with Xero for taxes, Shipstation for label printing, and use carrier calculated shipping rates to give your customers the best, most affordable shipping options.
Includes all features in the Commerce Basic plan, plus:
(source)
Once you decide which account you’d like to use, you’ll be brought to a checkout page. Here you’ll have the option to either pay monthly or pay annually. If you opt to pay annually, you’ll get a FREE domain with your site (which is a major perk!)

How To Create Your Domain
Step One: Click Settings on your Squarespace dashboard.

Step Two: Select Domains

Step Three: Select "Get a Domain"

Step Four: Type in the domain you'd like to use in the "Get a New Domain" search box.

This will create a list of domain options for you. Once you find the domain that you'd like to use.

Step Five: Select the domain of your choice and click "ADD"
This will add your domain to your cart. *Note: If you purchase an annual Squarespace plan, the pricing here will be $0!

Step Six: Click "Proceed to Checkout" & follow the instructions
You'll be prompted to fill in your contact and payment information on the checkout page. Even if your domain is free, you'll still need to enter your payment information in order to renew the domain each year.

Step Seven: Verify Your Domain
After purchasing your domain, you'll receive an email to verify. Just click the link in your email to verify and you'll be ready to roll!
Related articles


